In this tutorial I'm hoping to get a fully working "Hello World" program set up, and working from scratch. So for this tutorial to work 100% you'll need to be using the same version of Linux. I'm currently using AvLinux, which is based on Debian.
All derivates of Debian should work without any hassle, however as everyone has a different version of a piece of software, there will be small differences! Any version of linux should work, you might just need to adjust certain things.
So to install MonoDevelop, lets go to the Synaptic Package Manager, search for MonoDevelop,
and tick the monodevelop entry. Allow it to install all dependencies if it needs any. Let it download & install, it should just install as any other software does on your system.
*Launch MonoDevelop, just like any other program from the menu.
*This should bring you to the main MonoDevelop screen.
*In the center of the Welcome Page, click on "Start a new Solution".
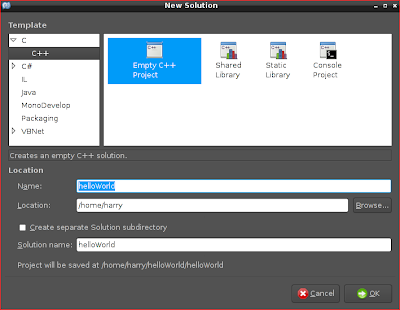
*The following should appear,fill in any Solution name you want.

*Create a new File (Top left: there's a "new" icon), and enter the following code:
#include <iostream>

int main ()
{

std::cout << "Hello World" << std::endl;
return 0;

}
* Now press F5, or else click on the Button with the pop-up "Debug (F5)".
This should show Hello World in the "Application Output" window at the bottom of the MonoDevelop Window.
Congrats, you've set up your enviroment & compiled C++. Now for the fun stuff..!
Till next time, -Harry
No comments:
Post a Comment